In SAP Business One,
you can save most documents as drafts. This lets you change and process them
before adding them to the database as regular documents. This may be required
because a document is only partially filled out and it will be completed later.
Or perhaps someone knows how to fill out one part of the document but needs
help from someone else to finish another part. Document drafts can also be used
as templates for documents that must be filled out over and over again with
minor changes.
A draft document
triggers neither a posting that changes quantities or values in the stock nor
changes in the accounting system for an invoice.
You can save the following types of documents as drafts:
- Sales and
purchasing documents
Incoming and outgoing payments
Checks for payment
Inventory documents, for example, inventory transfers, goods receipt and goods issue documents
You can also
generate and display a list of drafts according to your specifications,
enabling you to choose whether to delete, update, or add certain drafts.
This article will demonstrate drafts in a scenario: Your
business wants to
create a sales order document draft with a selection of items on it to enable
fast order taking on a Fall promotion.
Creating Document
Drafts
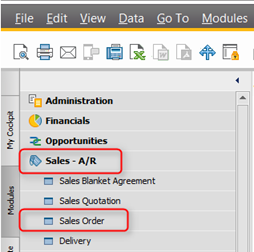
To setup the Sales Order Draft document, Go To Sales – A/R
> Sales Order
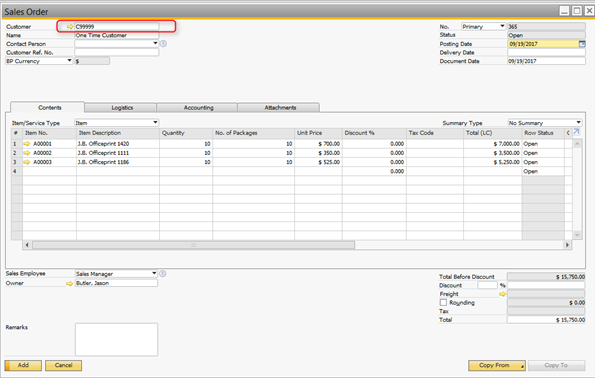
Enter a Customer Number
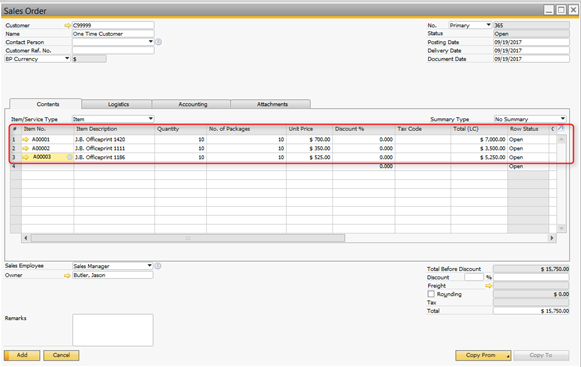
Enter Item numbers, Quantity and Unit Price. (3)
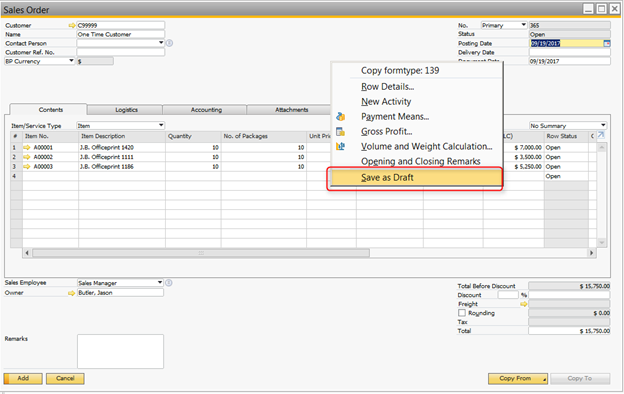
Right Click and Save as Draft
Adding a Sales Order from a Draft Document
To add a Sales Order from a Draft Document, Go To > Sales
– A/R > Sales Reports > Document Drafts Report (5)
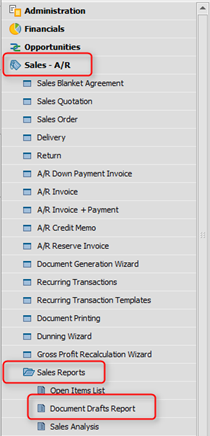
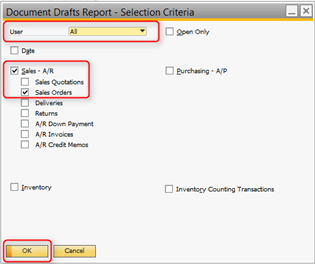
Select user All, Check Sales – A/R and Sales Orders. Click OK (6)
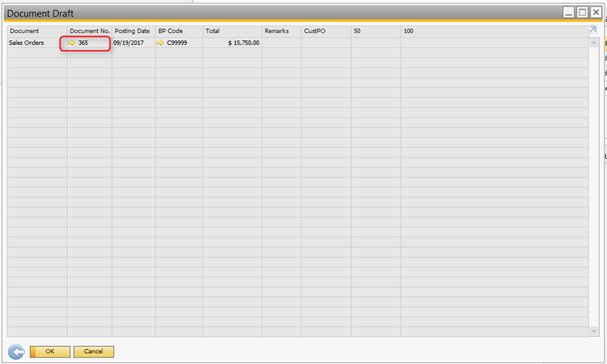
Click on Golden Arrow next to Document Number (7)
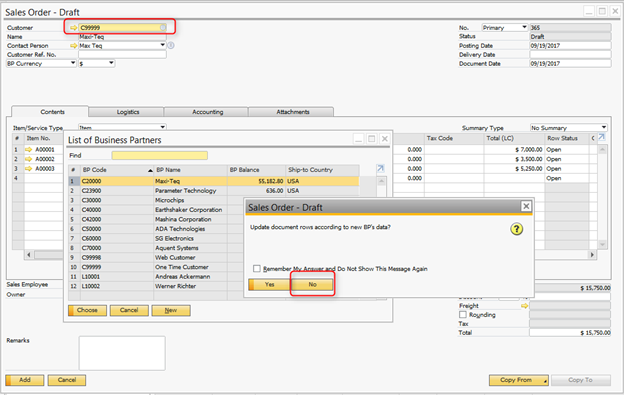
Enter a different Customer Code, Click No to update document rows according to new BP’s data
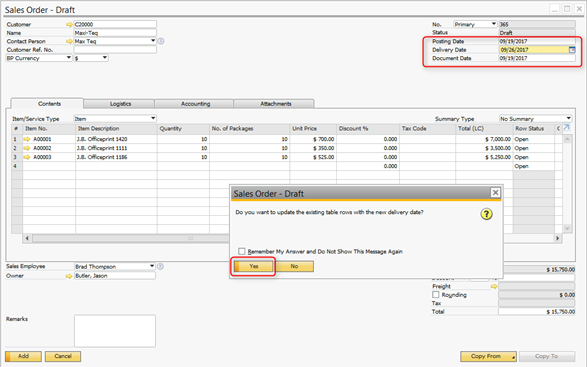
Enter a Posting Date and Delivery Date. Click Yes to update the existing table rows with the new delivery date.
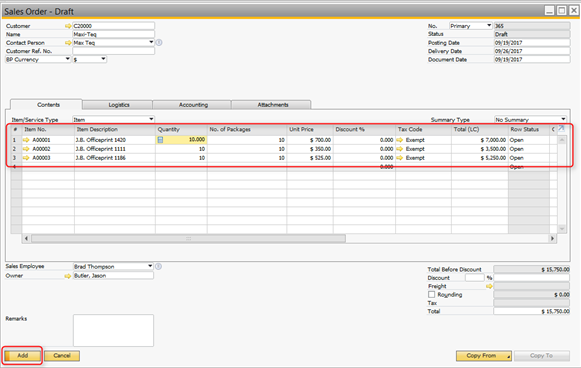
Make changes to Line Items as needed. Click Add
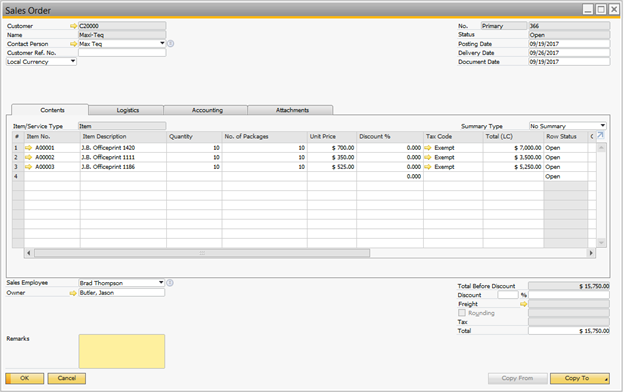
Sales Order is added

Select user All, Check Sales – A/R and Sales Orders. Click OK (6)

Click on Golden Arrow next to Document Number (7)

Enter a different Customer Code, Click No to update document rows according to new BP’s data

Enter a Posting Date and Delivery Date. Click Yes to update the existing table rows with the new delivery date.

Make changes to Line Items as needed. Click Add

Sales Order is added

